There are four ways to create an action.
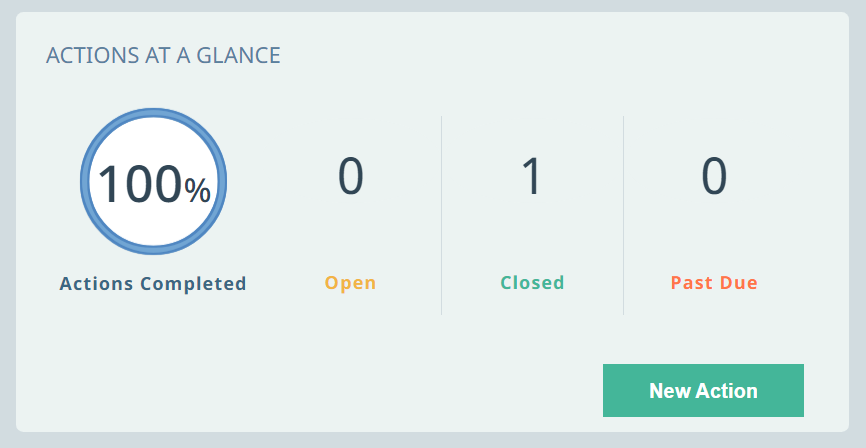
1. Select New Action in the lower right corner of the Actions at a Glance tile in the main Actions dashboard.
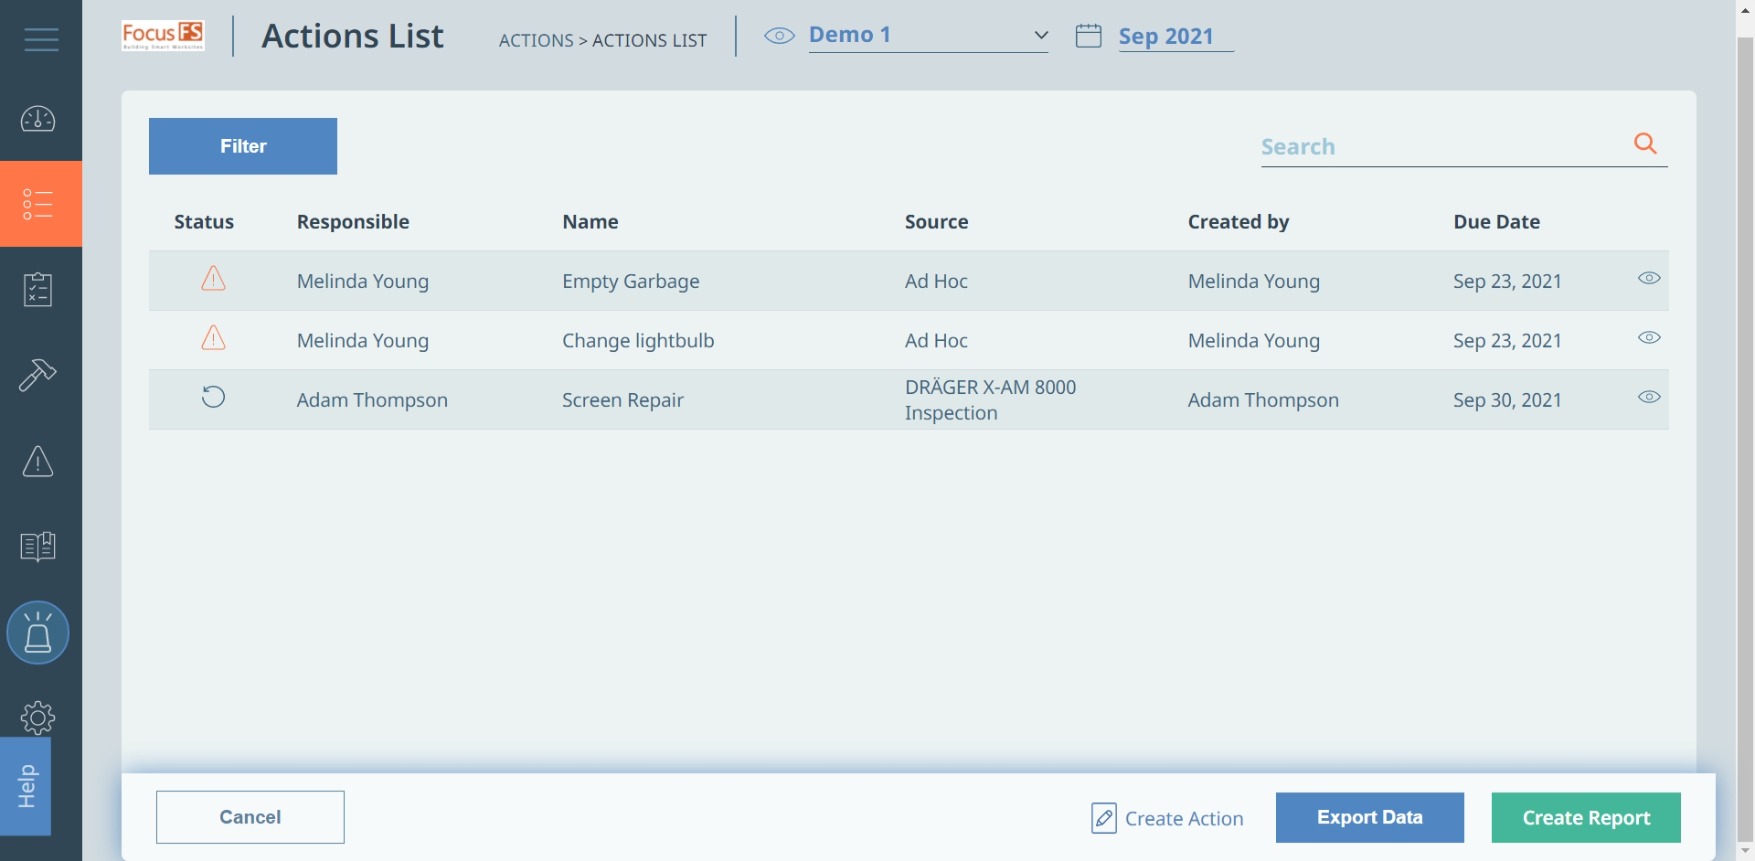
2. Select Create Action in the lower right corner of the Actions List page.
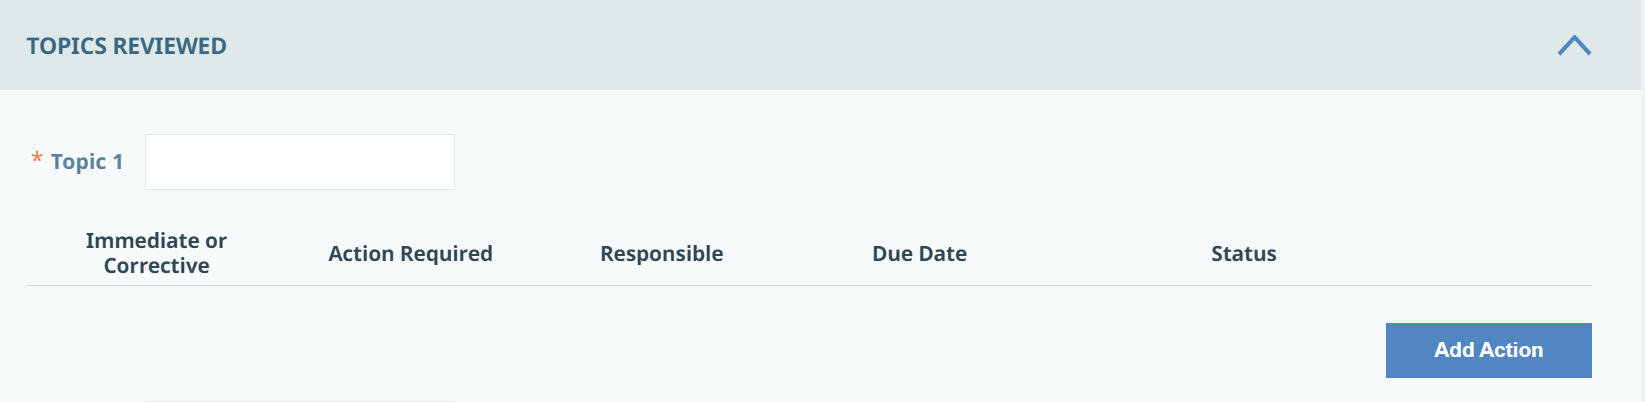
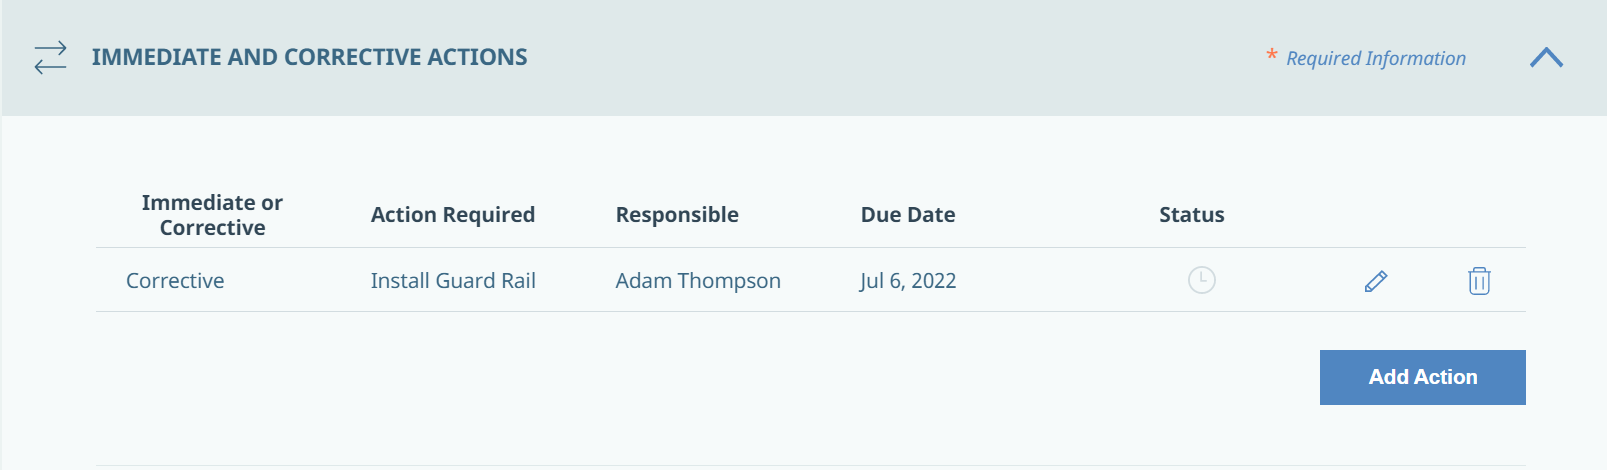
3. If there are Corrective Actions in a form that is being submitted, click the Add Action button to create and assign an Action. The form will appear as a Source in the Actions List.
4. When completing an Incident Preliminary Report, you have the ability to create Actions. Click the Add Action button and fill out the required information.
Creating a New Action
Once you have selected to create an action, the Create New Action page will open on your screen.
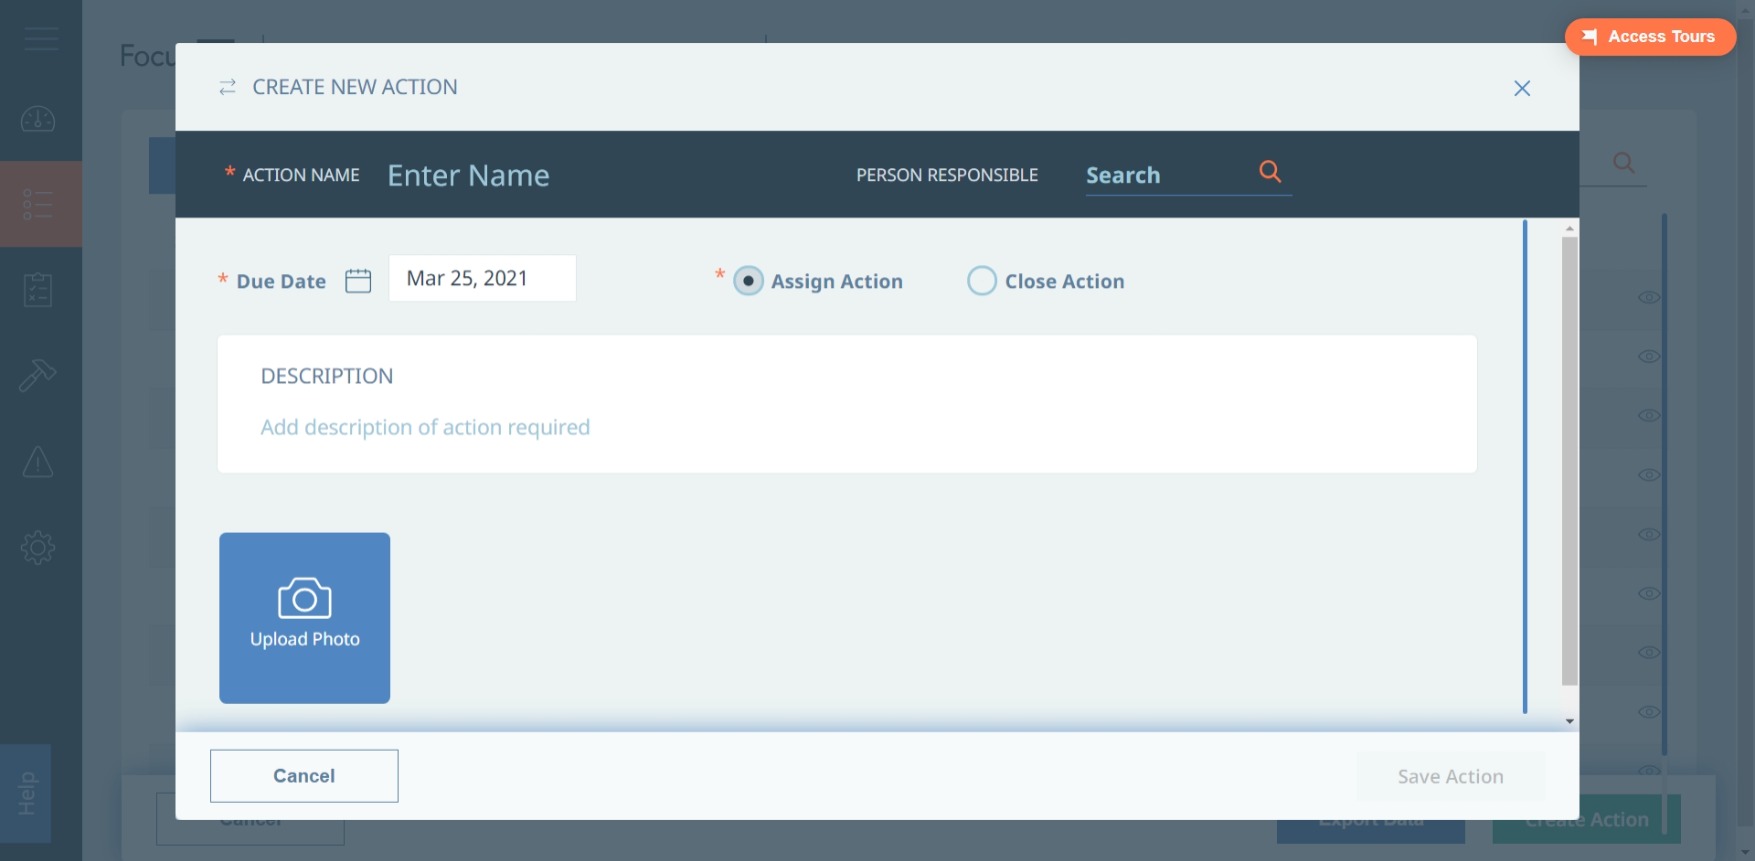
Here are some details about information you can input:
- Action Name – You need to assign each action a name. This allows a worker to search for the action in the search bar.
- Person Responsible – A person responsible is assigned to ensure the action is completed, and the action appears on their dashboard. Use the search bar to find the correct name.
- Due Date – A due date ensures the action is completed on time.
- Assign Action/Close Action – If the action can be closed or completed, you can assign it as closed. If the action cannot be completed in the moment, it needs to be assigned to complete at a later date.
- Description – Provide details regarding the action to allow a worker to read and understand what's needed to complete the action.
- Upload Photo – Attach photos to the action to provide more information to the worker who is assigned the action.
Select Save Action to save the action (or Cancel to close the window and not save the action). When the form is completed and saved, this new action will appear on the Actions List.